I always like a challenge. I have never made cake pops before, but like the look of them, so not only did I challenge us to make some cake pops, but we made slightly more complicated ones…..easter nest cake pops! They would make a change from the usual rice krispie easter cakes we usually make.
I thought they turned out quite well considering it was our first attempt and we didn’t have a mould. They tasted fantastic too! Here’s what we did…

Ingredients
- 1 cake (we used a madiera cake).
- Chocolate buttercream icing.
- Chocolate to melt.
- Lollipop sticks.
- Chocolate sprinkles.
- Mini eggs.
- Cake pop holder (we used egg boxes).
How to make easter nest cake pops
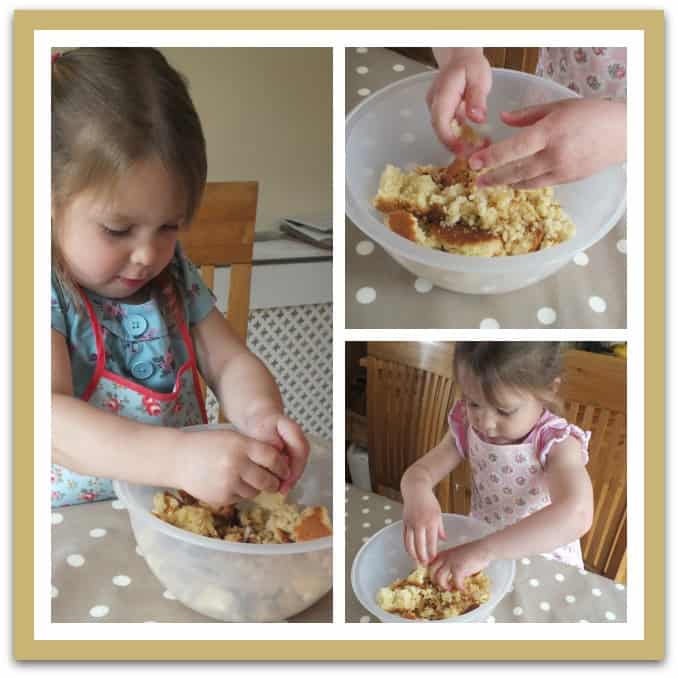
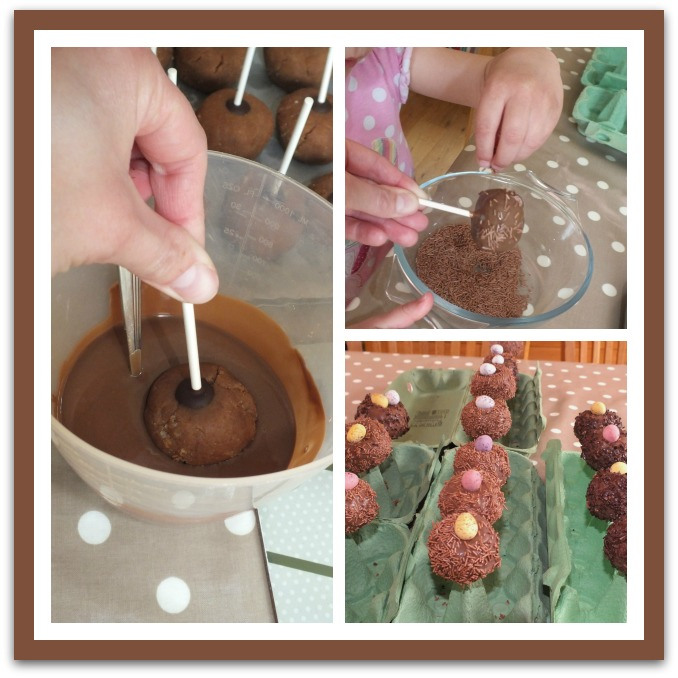
- Firstly you need to crumble up the cake into breadcrumb consistency. You could use a food processor, but we had fun doing this by hand.
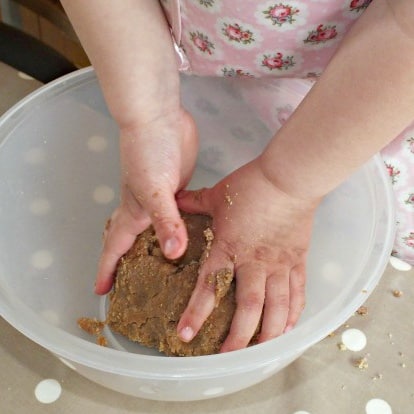
- Once the cake is all crumbled, add some chocolate buttercream icing, mixing it in until it sticks together and forms a ball.
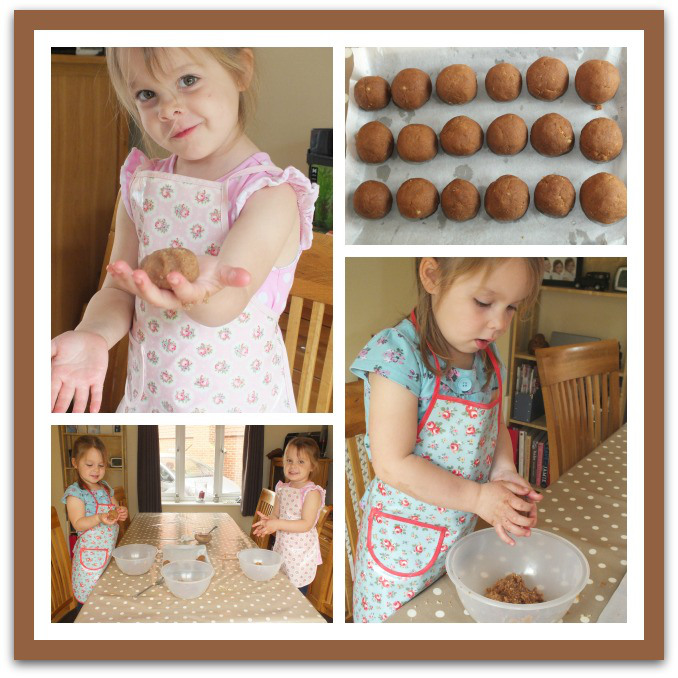
- Next, take a small amount of the mixture and roll it into balls and place on a sheet of grease-proof paper.
- To turn these from balls into nests, you need to lightly squash a finger print into the top of each ball (ready for the mini eggs to sit in), then put them in the fridge for a while.
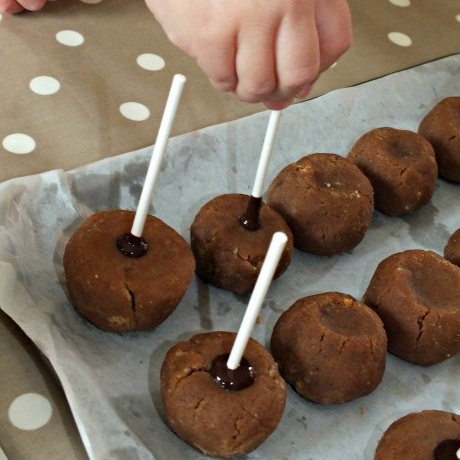
- Next, you need to melt a small amount of chocolate in the microwave, dip the stick about an inch into the melted chocolate and push the lollipop stick into the upside down ball. Be careful not to push the stick out the other end. Then put the balls with the sticks in, back in the fridge to harden.
- Melt plenty of chocolate in the microwave, dip the cake pop in the chocolate (be careful not to let it touch the bottom), then let the excess chocolate drip off for a moment (not too long or the sprinkles won’t stick well). Then either dip the cake pop in the sprinkles or sprinkle them over the top, place in a cake pop holder (we used an egg carton) and add 1 or 2 mini eggs on top.
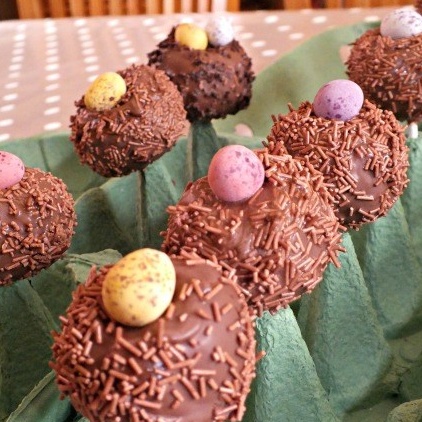
There you have some really yummy Easter nest cake pops. We all loved making them and we definitely all enjoyed eating them.
I must admit, these did take rather a long time, as everything was done in stages, but that was part of the fun. My children enjoyed washing up in between stages and didn’t get fed up at all. I will definitely be attempting to make more cake pops in the future.
See Also
These are fab! I’ve always been a bit scared to attempt cake pops, but your instructions make it seem so simple… I might just be brave enough to give it a go now!
I’ve never had any success with cake pops, I think I’m too impatient, lol. You do make these sound easy though,and they look lovely. Maybe, I’ll have another try.
I was given cake pop making things for christmas but I haven’t got a cake pop maker, now I know I don’t need one thanks to you, these look good.
I’m thinking of making cake pops for Potato’s 2nd birthday. I love that these are no-cook, so can be done in stages around entertaining a toddler. He’d really enjoy getting stuck in with these too I think.
These look brilliant, I haven’t made cake pops yet, on my list to do! I like the look of these ones 🙂
These look so good – I love cake pops but they are so time consuming to make lol
Wow – these look so yummy. Will so not be showing these to Lucas (or maybe I will) – I think we could have some very messy fun making these. Great photos xx
I had no idea that cake pops were so easy to make. Thanks for the tutorial!
So yummy! I didnt know its this easy to prepare! Will try to do this easter vacation as we dont have plans yet.